Monday, May 18, 2009

Surprise Soaps!

OK, there are some kids that just don't like to wash up. It's not likely that anyone would let this happen but that doesn't stop them from trying to worm out of it. Luckily they grow out of it...or at least we hope they do. Whether you have a reluctant washer or a child that just loves to play in the sink and make bubbles, this will be a hit. Who wouldn't like to find a prize in a ball shaped soap as they wash up?

You will need:
1 Cup of grated Ivory soap
1/4 Cup warm water
food coloring, if desired.
Small rubber animals or toys.

What to do:

1) Mix water, soap and food coloring together in a medium bowl. Stir the mixture until it begins to stiffen.
2) Remove the mixture from the bowl and knead it until it is the consistency of a very thick dough.
3) Roll the dough into the shape of a ball.
4) Make a hole in the center of the ball big enough to hid treasures in it.
5) Fill the hole with a treasure and seal with some extra dough.
6) Allow the surprise soap to dry overnight before using.

Note* You can also use thick cookie cutters to mold the soap surprises into fun shapes.

Greenhouse in a Bag

This is a super way to see how seeds sprout and grow.

You'll need:

A small Ziploc bag
3 wet cotton balls
2-3 large seeds ( beans work best )
clear tape

What to do:

1) Place the wet cotton balls in the Ziploc bag with the seeds placed against them.
2) Seal the Ziploc bag and tape it to a window where it will receive plenty of sunlight. Your seed should begin to sprout in 3-5 days.
3) After your sprouts grow at least 1 inch, you can transplant it in soil, so the plant may continue to grow.

Note: Make several greenhouses in a bag, using different types of seeds. Watch the seeds to see which ones sprout first and how fast they grow.

Friday, May 08, 2009

Goodness!

I've been away for quite a while! I have no excuse, other than, life just got in the way. It certainly has a way of doing that, doesn't it! The next few months are going to be very crazy so I can't promise to post more, but I will guarantee that I won't forgot that this site exists and I will be adding to it in the future. I have a file of some great projects sitting on my desk. I'll try to post a couple of them soon. In the mean time, flip though my prior posts and find something fun to do.

Thursday, September 18, 2008

Just in time for Halloween...


How to make Shrunken Heads.

Made from dried apples, these shrunken heads can be used as place cards for a Halloween dinner, suspended over a doorway or skewered on dirty dowel rods in the front yard.

Ingredients:
Several Granny Smith apples
Whole cloves
Handful of dry rice
1/2 cup of lemon juice
2 tsp. salt
Snips of wig hair

Tools:
Small bowl
Large spoon
Small paring knife or potato peeler
Wire rack
Bamboo skewers

In a small bowl prepare a mixture of the lemon juice and 2 teaspoons of salt. Peel apples and coat with mixture to prevent browning. Use the peeler or the knife to carve out eye sockets, a nose, mouth and ears. You'll want to create large facial features as the apple will shrink in size.

To create the eyes, place whole cloves into each eye socket. Insert dry rice into mouth cavity to make teeth. To accelerate the drying process, place the apples in an oven at the lowest temperature for a few hours. Keep an eye on the apples as you don’t want to cook them. Remove apples from the oven and place on a wire rack in a warm, dry place for about 2-3 weeks.

After the apples are dry, add snips of wig hair. Wrap hair around the sharp tip of a bamboo skewer and insert tip into apple. The hair should stay in place, if it appears loose add a drop of glue and allow to dry.

Friday, January 25, 2008

Indian Corn Jewlery


Indian corn Jewelry has the look and feel of high polished stone jewelry and its easy to make. I remembered that I had some corn hanging in the garage from last Halloween/Thanksgiving, so I used it for this project. The corn easily popped off of the cob.

You will need:

1/2 Cup Indian corn kernels
sewing needle
thread
small bowl
water

1. Pour corn kernels into a small bowl of water.
2. Let the corn kernels soak overnight or until soft.


3.Thread the needle. tying a knot at the end of the thread. I doubled the thread so it would be a little stronger.
4. Have an an adult push the needle through each soft kernel of corn until the necklace or bracelet is as long as you want it to be. Tie both ends of the thread together.

I remember making these in first grade. I was able to thread it by myself at that time but it really depends on the child and their motor skills. If the kernels are not soft enough, it is harder to get the needle through the corn.

Post note: If you do not have access to Indian corn, you can also make the necklaces with regular popcorn. I know you can dye it by soaking it in a mixture of RIT Dye and water. I believe you let the corn sit for two days in the dye before stringing the wet corn. After the necklaces are dry you can also coat them with spray varnish for a glossy look.

Tuesday, February 06, 2007

String fun


Have you ever made a Cat's Cradle? You should try it. I remember my dad and my Grandmother showing me finger string games when I was a kid. I was trying to recall some of the moves but was having trouble getting it right. I finally went online and found a great site with the details to lots of fun shapes. You could make The Wink. The title is a hyper link, so click it and get started today.

Sunday, June 25, 2006

Fruity Leather Roll-ups

You will need:

2 Cups appplesauce
1/4 Cu[ honey
Microwave safe plastic wrap
microwave safe tray

1. Stir applesauce and honey together in a small bowl.
2. Line the microwave safe tray with plastic wrap.
3. Pour a 1/8" layer of the applesauce honey mixture on top of the plastic wrap.
4. Dry the mixture in the microwave on the meduim setting for 3 minutes. Let the mixture cool for 3 minutes and then repeat the process until the fruity leather begins to dry. Results may vary depending on the wattage of the microwave.
5. Remove the fruity leather from the tray. Keep the plastic wrap as backing. Cut the leather into strips and roll it up.

For added flavor: sprinkle the applesauce honey mixture with cinnamon before placing in the microwave.

Thursday, June 22, 2006

Sidewalk Paint

This is pretty neat, its much easier to cover a large area of your sidewalk in a fraction of the time it would take you if you used traditional calk. Sidewalk paint can easily be washed away with water.

You will need:

1/4 Cup of cornstarch
1/4 cup of cold water
6-8 drops of food coloring

How to make it:

1. Mix cornstarch and cold water together in a small plastic bowl.
2. Add food coloring and stir.
3 Repeat this process to create different colors of sidewalk paint.

Just imagine what you can make with this paint...large rainbows, landscape pictures, hopscotch grids, make- believe roads and highways for toy trucks.

Shake and Make Ice Cream

You will need:
2 Tblsp sugar
1 Cup milk or half and half
1/2 tsp vanilla
6 Tblsp rock salt
1 pint-sized plastic sip bag..not the cheap ones, you will need a strong bag
1 gallon-sized plastic sip bag

How to make it:"
1. Fill the gallon-sized plastic sip bag half full with ice. Add rock salt and seal
2. Pour the sugar, milk/half and half, and vinilla into the pint-sized sip bag and seal.
3. Place the pint-sized zip bag into the gallon-sized bag and seal.
4. Shake the bag for 5-7 minutes.
5. Open the small zip bag and enjoy.

Please note: If the small bag comes open it will not help your ice cream to taste better...rock salt, ewwww. I have also done this with a small coffee can inside a large coffee can. We rolled them back and forth between two people on the floor. It gets pretty cold so we wore oven mits, but you can also wrap the zip bags in a towel to avoid frozen fingers.

You can add 1/2 tsp of peppermint extract of 3 Tbsp of crushed peppermint stick to make a fun holida ice cream.

Thursday, June 15, 2006

Permanent Sand Castle Clay

What you will need:

1 cup of sand
1/2 cup cornstarch
3/4 cup liquid starch

How to concoct it:

1. Combine sand and cornstarch in an old pot
2. Add liquid starch adn mix.
3.Cook the mixture over medium heat while constantly stirring. Eventually the mixture will thicken and turn into dough.
4. Remove pot from the stove and let the sand castle clay cool.
5.Remove clay from the pot and knead it 20-30 seconmds before using. Let sand castle clay scultures dry until hard.

Tips and ideas: Color sand castle clay by adding 1 Tablespoon of powdered tempra paint to the mixture before cooking.
Use candy molds and cookie cutters to shape
sand caslte clay.

Spray Chalk

This washable spray paint works on sidewalks, in the snow, or on the sand.

You will need:

4 Tablespoons cornstarch
1 Cup warm water
4-6 frops food coloring
1 small plant mister

How to Concoct it:

1. Mix all ingredients together in a medium bowl.
2. Pour the spray chalk mixture int oa small plant mister. Shake and spray.
3. Avoid clogging by shaking the paint mister before each use.

Tips & Ideas:

  • Use Spray Chalk at the beach to paint colorful sand sculptures on sidewalks.
  • To create graffiti-type art.
  • Use in the snow to create dazzling winter rainbows and colorful snowmen.

Thursday, April 27, 2006

Time for a little cheap entertainment....


What can we do with bread ties....you know those silly plastic clips that come on bread, rolls or english muffins...stuff like that. Here is something that is kind of fun. (I'm easily amused...lol.) Break or cut one of the closure tabs of the tie. lay them on a smooth surface, I think the floor or a table top works best. Take your finger and give the remaining tab a quick flick....and away it goes, spinning across the surface. fun huh.

You can put a masking tape line on the floor and try shooting the tie across the line or even knock your tie across the line by bumping them. The ties come in different colors or brands so it is easy to divide them up. If you don't want to mess with tape, use a seam line on the tile or a board on your hardwood floors.

See who can spin the farthest...who can spin the longest...the options are endless.

OK, the downside to this is that you are going to find these puppies everywhere...under the stove, the table...everywhere. If I were you I would number them with a smudge proof magic marker and make a game out of it. At the end of each round of spinning, you have to account for each and every numbered tie. Listen, on a rainy day...you WILL thank me for this one.

Wednesday, April 05, 2006

Ocean in a bottle

You can have a calm ocean even if you can't go to the beach What you need:
  • Clean, clear plastic bottle with cap
    Water
    Baby oil or mineral oil
    Blue food coloring
    Small sea shells or plastic fish (if you like)

Here is what you do:

1. Fill the plastic bottle halfway with water.

2. Put three to four drops of the blue food coloring into the water.

3. Put the cap on the bottle tightly.

4. Shake the bottle to mix the color into the water.

5. Take the cap off of the bottle.

6. Pour the oil into the bottle almost to the top but leave some space. (Add the shells or fish if you have them.)

7. Put the cap on the bottle tightly.

8. Rock the bottle slowly from left to right.

9. It looks like the waves in an ocean!

Lickety-Split Lip Gloss


Materials:

1 Tblsp solid vegetable shortening

  • 1 teaspoon honey
  • 1 packet (.13 to .23 oz, or enough to make 2 quarts) unsweetened flavored powdered drink mix, such as Kool-Aid
1/4 teaspoon hot water

Step 1: Combine the shortening and honey in a small bowl.
Step 2: In a separate bowl, stirr together the drink mix and water until the powder is dissolved.
Step 3: Stir the water mixture a drop or two at a time into the base mixture, until the gloss is colored and scented to your liking.

Tips: To save the lip gloss for another day, refrigerate it in an empty lip gloss pot or other clean container for up to three days.

The Hunt Game


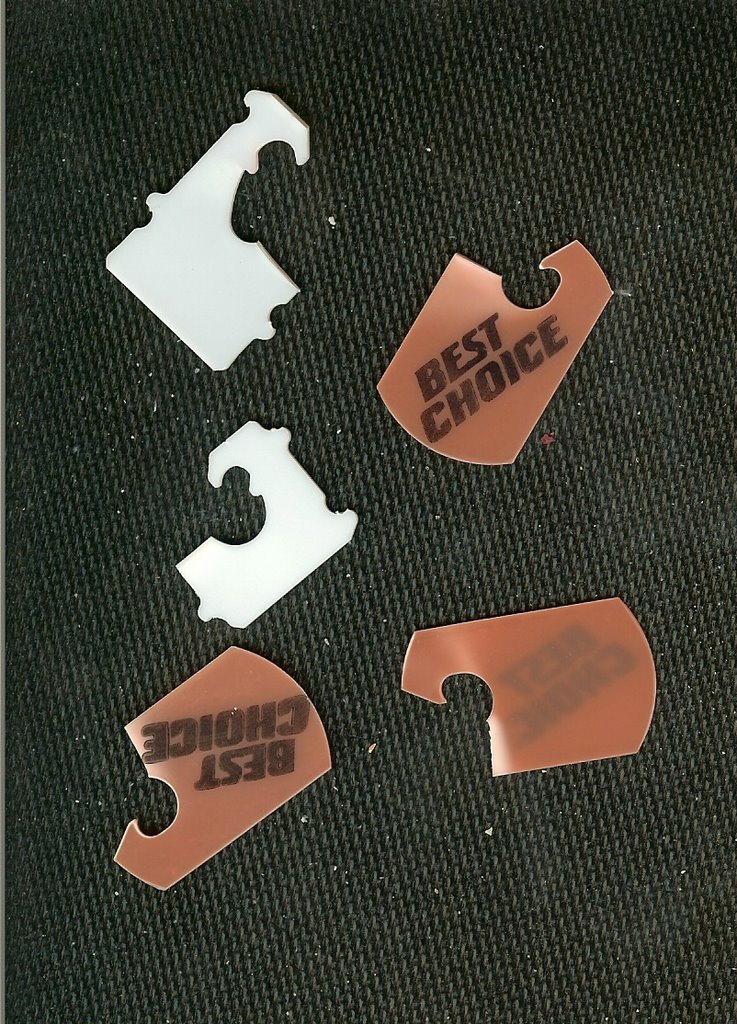
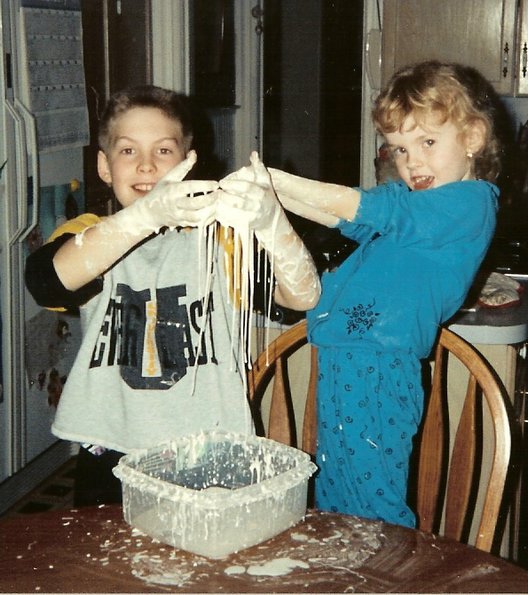
I almost forgot about this game! I invented it one morning when the weather was nasty and I had a house full of kids with WAY to much energy. I sat down and quickly made a few cards like the ones on the left. I put a picture of something and a few quick words for an extra hint. It is nice when kids are learning to read. What you put on the cards really depends on your home. Below is a sample list of the cards I made: (Click on the picture to the left for a larger view of the card examples.)
  1. freezer
  2. calendar
  3. door knob
  4. water faucet
  5. clock
  6. chair
  7. picture frame
  8. ping pong table
  9. sock
  10. pillow
  11. microwave
  12. stereo
  13. remote control
  14. plant
  15. fake flower
  16. rug
  17. drawer
  18. window
  19. spoon
  20. light bulb
  21. tooth brush
  22. bird cage
  23. phone
  24. crayons
  25. mirror
  26. key rack
  27. apple- (fridge)
  28. can of corn
  29. towel rack
  30. alarm clock
  31. answering machine
  32. tissue box
  33. TV
  34. electric outlet
  35. basket
  36. stairs
  37. candle
  38. toaster
  39. broom
  40. piano

Your list can be longer or shorter, depending on how much time you want to spend hiding the cards. The last card should be highlighted and say "THE END- thank you for playing!" The kids will want to run through the house like maniacs finding the cards but I made a rule that if I caught them running, that person would have to sit out for two card searches. That was pretty tough to do, so they slowed down. The most important thing for you to tell them is that they CAN NOT pick up a card that they are not looking for. If they see it early, they must leave it or the game will not work. They just have to remember where they saw it. One card leads you to another, when you find it, that card will lead to another....until the last card is found. Also, if any rooms are off limits, announce it and stress there are no cards hidden in that room. They must keep all the cards they find together so you can hide the cards again if they want to play some more.

Hiding the cards. (This is where your workout begins!)

This can be a little tricky until you get the hang of it. Pile up the cards in a random order, with "THE END" card on the top of the pile. Now lift up the "THE END" card and look at the card under it. That is where you will hide that card. For example. If the card underneath is a SOCK, you will hide "THE END" card in a sock drawer. Now lift the card under the SOCK card. Lets say it is an APPLE card, that means you hide the SOCK card in the spot you keep your apples. The card under the APPLE card is a TOOTH BRUSH card, so you hide the Apple card by the tooth brushes. ECT, ECT, until you are left with the last card. That is the beginning card for the HUNT.

Some of the cards with have pictures that have multiple hiding places, for example...the light bulb card. Remember to put the card near the bulb but make sure it is not a light that will be turned on. We don't want the bulb to be hot if kids are going to be searching near it. I often tucked the card on the side of the lamp shade so they really had to look for it. On the outlet, I would tape it over an outlet that had child safety covers. You get the point. Remember to make them move from one room to another....we want them to wear themselves out! I used to go from the basement to the second floor bathroom, to the kitchen, back upstairs then to the basement, ect. Sometimes I would put the next card in the same room to throw them off. I made sure that you could see at least a tiny bit of the card if you really looked all around the hiding spot. If they were finding them to quickly, I would hide them completely.

The goal is to follow the cards in ORDER so you are lead to "THE END" card. If you hide the cards correctly it will work. So, if they have a CHAIR card, they have to look around all the chairs in the house...under them, under the cushions, behind them, ect. When they find the card hiding under the chair they will look at it and see it leads to an tissue box...ect, ect. If you want, you can give them points for the number of cards they return to you and subtract a minute for each minute it took for them to find a card, to give them a final score, you may. I found that wasn't necessary because they enjoyed the hunt more than the scoring.

Friday, March 31, 2006

Dress Up clothes

Those little outfits that you buy at the toy store are expensive, aren't they. Well, you can make a ton of dress up outfits for kids and you don't have to have a lot of sewing skills to do it. I bought all that fabric at Walmart or fabric stores in the discount section for very little money. If you keep an eye out, you can pick up a half a yard to a full yard of fancy fabric for $1.00-$2.00. I made all of these little skirts, halter tops, shawls, flower hair wreaths, ect...for my friends 3 year old. I put in elastic waists and left access to the elastic so it could be tied in a knot and adjusted as the child grows. I don't know how to sew off a pattern so I just winged it and they turned out so cute. I think you just have to have a basic idea how things are made and patience. I can't wait to see the pictures of her in the outfits but I have to wait for her to open her presents for her birthday.

Monday, March 20, 2006

From pot holders to childrens aprons..

Posted by Picasa What can you make with two pot holders, a kitchen towel, some ribbon and a couple buttons? The perfect size apron for kids. The neck sash is adjustable and the waist sash ties in the back. They are machine washable and are great, not only for playing house but for helping stir up some cookies.

The wonderful thing about these aprons is that they are easy to make and kids love to wear them. It sure cuts down on the mess. Instead of the tummy of a shirt covered with flour, you have an apron that you can toss right it the washer. It works great for mud pies too!

If you would like directions, I will be posting them on my craft site later in the month. I will add a link above when I get the pictures and directions posted.

Tuesday, January 31, 2006

Sparkling Star Dip

-Making crystals is a beautiful way to remove a solute from a solution.

You'll need:
Borax
water
pipe cleaners
jar
string
pot
tablespoon

1) Ask a grown-up to help you fill a far with hot water (Boiling water is best so use caution) Add Borax, 1 tablespoon (15ml) at a time until no more will dissolve. (This will be about 3 tablespoons (45ml) per cup (250ml) of hot water used.)
2) Make a star shape with pipe cleaners; then attach a string to the shape. Place the star in the solution. Let it remain overnight.
3) The next morning, lift out the star by the string. Enjoy the sparkling results.

You can also do the experiment using Epsom salts. You'll need about twice as much Epsom salts as water.

Compare the shape of the Borax crystals with the Epsom salt crystals.

Saw Dust Bugs

You'll need:
2 C. (500 ml) saw dust
1 C (250 ml) wallpaper paste
water
bowl
pipecleaner

1) Mix the saw dust and wallpaper paste in the bowl. Slowly add water until a thick dough forms.
2) Shape the dough into saw dust bugs: then poke pieces of pipe cleaner into the heads for antannae.
3) You can paint the dough when it is dry.

Lint Molding

Materials:
2/3 Cup dryer lint
2 Cups cold or warm water
2/3 Cup flour
3 drops oil of cloves for scent
saucepan
newspaper
box, bottle, balloon or mold

Process:
1) Stir lint and water in a sacuepan
2) Add flour and stir to prevent lumps
3) Add oil of cloves
4)Cook over low and stir until mixture forms peaks
5) Pour out and cool on newspapers
6) Shape over boxes, bottles baloons or into a mold, or use like papier-mache.

Hints:
1) Makes 4 cups
2) Dries in 2 to 5 days
3)very hard and durable
4) dries smooth if pressed into a mold.
5) dries rougher if shaped over an object

Snack art- edible pudding paint


you will need:

-1 box vanilla or lemon noncook pudding mix
-ready-made piecrust of sugar cookie dough
-food coloring (blue, red, yellow)
-rolling pin
-cookie sheet
-plastic spoons for mixing

1.) Prepare the pudding, following package directions.
2.) While pudding sets in refrigerator (about 5 minutes), roll out piecrust or cookie dough and form into a rectangle about 1/4 inch thick. Bake on a greased cookie sheet for 8 to 10 minutes, until lightly browned. Cool.
3.) Divide the set pudding into several muffin cups.
4.) Mix,one color of food coloring into each cup. Try mixing the primary colors (red, blue, yellow) first. Use 5 to 7 drops for every 2 Tablespoons pudding.
5.) Next, create secondary colors(orange and green work best) by mixing 2 drops blue +7 drops yellow for green. 2 drops red +7 drops yellow for orange.
6.) Paint on your piecrust "canvas" using fingers, a new clean paintbrush, a medicine dropper, or a pastey bag.

Tip: For the younger kids, pudding also works great as fingerpaint on waxed paper.

Click on image for a larger view

Monday, January 16, 2006

Tye Dye: Don't let it scare you!

Sure it can be a messy project to undertake. You only live once. You just have to be prepared.
I've helped numerous kids make, not only tye dyed shirts, but socks, shorts, and even undies. Just remeber to check the labels. You want white clothing with the highest percentage of cotton that you can find, that way the colors will be very bright. If it has too much poly or nylon it will turn out pastel instead of vibrant. I always set up outside on garbage bags so you don't have to worry about spills on your floors or table. I use a Rainbow Rock kit that you can often purchase at Walmart or a craft store like Micheals or Joann's Fabric. I've never had a problem with the kit and they make them in several different color selections so it adds to the fun. They have easy to follow directions. Plan ahead and it will go smoothly. Wear old clothes! Put plastic gloves on to reduce the staining on your fingers. Buy some extra rubber bands in case the kids want to go nuts with them. We always have fun making them but the best part is wearing your art work.

Saturday, January 14, 2006

Be a Perfume Chemist


Alcohol is a good solvent for dissolving the fragrant oil solutes from herbs and flowers.

Place one of the following ingredients in a clear film canister: cloves, vanilla bean, cinnamon bark, orange or lemon peel bits, lavender or rose petals.

Cover with two tablespoons (30ml) of rubbing alcohol and secure the lid. Shake once a day for a week.

When the solution smells more like the fragrance than the rubbing alcohol, it's ready. Dab the scented rubbing alcohol on your wrist, and smell the fragrance.

You've concocted perfume! For stronger scents, replace the solute with a fresh one after a week. Experiment with the solutes to find your favorite scent.

**It takes 8,000 crushed roses to make just one gram (barely a dab) of rose oil for perfume. Luckily, scientists are able to analyze the molecules that make up a flowers scent and then artificially reproduce the natural fragrant oils with chemicals in the laboratory. The newly scented solute is dissolved in an unscented solvent. The result is a flower friendly solution- PERFUME!

Dracula's Favorite Soap- Science experiment


You'll need:
a bar of soap
2 or 3 laxatives (or pills such as Ex-Lax or Feen-a-Mint.)
1 Tablespoon of rubbing alcohol (15ml)

What to do:
Mash one or two pieces of the laxative in a tablespoon of rubbing alcohol. Rub some of the solution on your hand and allow it to dry. Then wash off with the soap.

What happens:
The soapy water turns bright red.

Why?: The laxative contains a compound know as phenolphthaliem. This substance turns a brilliant red when mixed with an alkali. Soap is make from fat boiled together with a strong alkali. When you add water, you free some of the alkali. This alkali mixes with the phenolphthaliem on your hands- and turns your hands blood red.

Color Melts

What color do you get when you mix blue and red?

Make colored ice cubes by adding food coloring to the water before freezing it. Once frozen add two cubes of different colors together in see through glass. Watch the 2 colors melt together and create a new color.

Push- It- Apart Butter

What's the opposite of mayonnaise? It just may be butter. Mayonnaise- making brings fat (oil) and water (vinegar) together. Butter- making forces fat and water apart.

If you shake cram with enough force, the tiny drops of fat that float throughout it are pushed together to form butter chunks.

1) Fill a plastic jar about half full of cream. Add a clean marble. Seal with a lid.
2) Shake the jar vigorously in a figure-eight pattern. When you don't hear the clank of the marble any longer, you'll know the cream had thickened into whipped cream.
3) Keep shaking and listening again for the clank. This means the butter is separating from the liquid. When you see several small floating chunks, stop.
4) Use a fork to scoop the butter chunks into a bowl. Blend them together with the back of a spoon: then squeeze out the extra liquid. Spread the cream butter on toast or muffins.

Friday, January 13, 2006

Homemade Finger Paints

1 envelope unflavored gelatin
1/2 Cup cornstarch
3 Tablespoons sugar
2 Cups cold water
food coloring
dishwashing liquid
white shelf paper

Soak gelatin in 1/4 C water (warm) and put aside. In a medium saucepan combine cornstarch and sugar. Gradually add water and cook slowly over low heat, stirring until well blended.

Remove from heat and add softened gelatin. Dicide mixture into separated containers for each color.

For each color first add a drop or two of liquid detergent and then add food coloring a drop at a time until you have the shade you want.

Store up to six weeks in the refrigerator.

Sugar Painting

2 Tablespoons sugar
1/2 Cup warm water
box of colored chalk

Mix together first two ingredients. Dip the tip of colored chalk into the water and draw a picture. Chalk picture will be brighter than regular chalk drawings. Chalk will not work very well when dry.

Salt Painting

1/2 Cup liquid starch
2 Cups salt
1 Cup water
food coloring

Mix all ingredients. Paint a picture. Pictures will sparkle when dry.

Face Paint *NON-Toxic if Swallowed*

Paints one child:

2Teaspoons of Crisco
5 Teaspoons of Cornstarch
1 Teaspoon of flour
3-4 drops of glycerin
food coloring
cold cream

Mix first three ingredients to make a smooth paste. Add glycerin for creamy consistency. Add food coloring as desired. Apply a thin layer of cold cream to childs face. Apply face paint- avoiding eyes.

Hopscotch


I loved hopscotch as a little girl. Not to toot my own horn, but I was a pro at it. Its a fun game for boys to play too. It helps you to recognize your numbers, learn to count and it helps you work on you balance and coordination as well. The wonderful thing about it was you could play it just about anywhere. If the weather was nice, you could use chalk to draw out the playing field or in a pinch, even an old piece of brick works. If the weather was nasty, rainy, snowy, or just way to cold, you could still figure out a way to play. You can make your own hopscotch mat by clicking here for directions. If you didn't have a basement floor that your parents would let you use chalk on, you improvised. Masking tape worked wonders on a cement basement, vinyl or tile kitchen floor, or even carpet. You don't have to use a rock as a marker when playing inside. Why not try a beanbag or a quarter, even a game piece from one of your board games will work. Click the title to take you to a link containing a selection of hopscotch games and rules. Why wait, start playing now.

Thursday, January 12, 2006

Goop!

This is my cousin Shannon in 1991 or early 1992, when I used to babysit for her. She's a high school senior now, planning on joining the Air Force. She liked playing with goop as much as I did. I sat her on the kitchen floor because it was easier to mop up that way.
Then we have Katie and Chris in 1992 at my first nanny job. Chris is graduating from Dartmouth this June and Katie is a Freshman at Franklin and Marshall in Pennsylvania. Goop is a lot of fun, its just messy when you have more than one kid playing in it. I learned its best to sit them in an empty bathtub if you have a couple of messy kids, that way you can wash it down the drain. Let's face it, if they get play dough all over, they are going to make a bigger mess with Goop.

Mix together one box of cornstarch and water. Only add enough water so that you can move your hand through the mixture easily when going slow, or with difficulty when moving fast. I know it sounds strange but you will see what I mean. You can color it with food coloring but I think it is best to leave it its natural color. Posted by Picasa

Pasta and Rice Dye

Use this mixture to make colored pasta for necklaces or colored rice for textured art.

Materials needed:
a variety of pasta shapes that can be strung
food coloring
rubbing alcohol
waxed paper
plastic bowls
slotted spoon

Getting ready: Prepare the dye for the pasta by mixing one cup of rubbing alcohol with several drops of food coloring. Let the pasta soak in the mixture until it is colored. Remove the pasta from the dye with the slotted spoon and let it dry on a sheet of waxed paper.


I also have a recipe for this project that suggests using 2Tablespoons of rubbing alcohol with 1/2 cup of water and adding the desired amount of food coloring. Soak rice or pasta until the desired shade of color has been reached.

Gak -Homemade

You'll need:
wire whisk
1 C. all-purpose glue
3/4 C. water
1 Tablespoon tempra pain
Borax

1) Mis together with wire whisk, the all-purpose glue, water, and tempra paint. I use the powdered tempra, but the liquid works just as well- just don't mix the powder too thin.

2) Mix sereratly 1/3 C. water and 1/2 twp borax. Slowly pour borax mix into glue mix.

3) Let stand a few minutes, then knead. Pour off any remaining liquid. Stor in plastic bags.

4) repeat for different colors.

Soap Crayons

Take one cup of powder laundry soap and add 30 to 40 drops of food coloring.

Add water by the teaspoonfuls until the soap becomes liquid.

Stir well

Pack soap into an ice cube tray.

Set in a sunny, dry place for two days.

Crayons will become hard and great for writing in the sink or tub.

Wednesday, January 11, 2006

Homemade Sidewalk Chalk


1Cup plaster of Paris (do not pack)
Almost 1/2 C cool water
liquid tempra or powdered tempra
margarine tubs or other disposable mixing containers
disposable molds- toilet paper rolls with foil bottoms work.

Pour plaster into a container. Using a disposable stick, stir in most of the water. Add 2 to 3 tablespoons of tempra, mixing well, especially at the bottom. Add a little more water so the mixture thickens, stir well, and pour into the molds. You can use the plastic tray from Manicotti noodles, paper cups, or toilet paper tubes with foil bottoms. Remobe the molds after the chalk is completely dry.

Makes 27 sticks for 15 cents each. Size 5 1/2" x 1 1/2" x 3/4"

2 different Bubble Solutions


Mix ahead of time for best results:

6 parts water
2 parts Joy dishwashing liquid
3/4 part corn syrup

This recipe costs roughly 18 cents per cup.

************************************
1 Cup of water
1/3 Cup of liquid soap
1 tablespoon of Sugar

Make a wand by bending 8" wire into the form of a loop.

Homemade Ink


1 old sock or thick plastic ziplock bag
hammer
12 walnut hauls
small sauce pan
1 C. water
small jar with lid
measuring spoons
1/4 teaspoon white vinegar

Place the shells into the sock or bag and close secruely. Lightly hammer the sock to break up the hauls. The more broken up theshells are the better. Simmer on low heat for 30 minutes. Turn the heat off and let the shells soak in the water overnight. (Quite a bit of it will have cooked away.)

Pour the brown ink you've just made into a small jar and add 1/4 teaspoon of white vinegar. The vinegar will keep the color from fading andthe ink from spoinling

Toothpaste Putty

Materials:
1/2 T toothpaste (creamy, not gel)
1 T. white glue
2T cornstarch
1/2 T water
small dish

Process:
1) Mix toothpaste, glue, and cornstarch in dish.
2) Mix with one finger
3) Add water
4) Mix until you have a lump of putty.
5) wash and dry hands
6) Squeeze and roll putty into a ball. HINT: The more its rolled, the better it gets.
7) Push, pull, roll and explore the putty.

Putty begins to dry in 20 minutes, so to soften it, use a drop of water. Toothpaste putty will dry rock hard in 24 hours.

Homemade Silly Putty

1/2 Cup of Elmer's Glue
1/4 Cup of Sta-Flo Liquid Starch

Mix together well. It needs to dry a bit before its workable.
Store in a airtight container.

Keep out of hair, fabrics and carpet as you would the store bought Silly Putty.

Microwave Modeling Dough

2 C. flour
2 C. water
1 C. salt
2 tsps. cream of tartar
2 T. cooking oil
food coloring

Mix in a large microwave-proof bowl.
Microwave on high for 5 minutes.
Stop every minute to stir until thick.
Cool and knead with hands until smooth.
Store in a cool, dry place.

Color-Me-Clean Tub Paints

Talk about good clean fun! Your bathtub Botticellis are sure to appreciate the bright colors of this smearable, sudsing medium. Try dividing the paints into a muffin tin or ice cube tray for an instant palette. But don't try getting your kids out of the bath in a hurry.

Materials:
1/2 Cup liquid hand soap, clear or white
1 teaspoon cornstarch
food coloring

Step 1: Combine the soap and cornstarch in a small bowl.
Step 2: Divide the mixture into separate containers, then add food coloring one drop at a time. Caution: Test the paints on a small area of your tub or wall to make sure they won't leave a stain: darker hues may be more difficult to wash off.

Tips: Apply to tub and body with fingers or paintbrushes. Use bathroom cleanser to clean the tub if any color remains. Keep leftover paints in an airtight container in the refrigerator for up to three days.

Crystal Rock Garden

Bring 1/2 C. of water to a boil, then add 2 ounces of alum (found in the canning or spice sections of super markets), stirring until the alum is dissolved.

Pour the solution into a clear glass bowl, half filled with assorted clean rocks and pebbles. With in hours you should be able to see alum crystals forming as glass like squares. Within several days you should have a number of crystals to look at.

*Note: Geodes and many other rock crystals were formed the same way, when water saturated with materials seeped into spaces in rocks. When the liquid evaporated, the crystals were left behind.

The Toddlers Property Laws

If I like it, its mine.

If its in my hand, its mine.

If I can take it from you, its mine.

If I had it a little while ago, its mine.

If its mine, it must never appear to be yours in any way.

If I'm doing or building something, all the pieces are mine.

If it looks like mine, its mine.

Hide and Seek Sounds

materials: 4 index cards or 4 pieces of paper, pencil.

Begin by taking 4 index cards and write a single letter- m, d, f, g, ect... on each card. Use consonants... yowels don't work well in this game.

Hide the cards around the room.... in plain view. Tell child "Somewhere hidden in this room is the letter that makes the sound mmmmm. Look until you find it. If you have trouble, I'll give you hints."

If they find the wrong card... make its sound (f...ffffff) and have them put it back where they found it. give the child a hint if they would like help. (hot ,cold, getting warmer)

Point: To match consonants with proper sounds, from the easy ones like t to letter sounds that are more difficult, like q (kw) and x(ks) They will even learn that "c" has 2 sounds, as does "g"

Pearly Soda Clay

This stuff is gorgeous. It's smooth and silky in your hands, it has a porcelain like finish and a soft, eye-catching shimmer when dry.

Materials: 1 Cup baking soda
1/2 Cup cornstarch
3/4 Cup water
food coloring (optional)

Step 1: In a sauce pan, stir together the baking soda and cornstarch. Add the water, mixing well.

Step 2: Cook the mixture over low heat (adults should supervise), stirring occasionally, until it resembles mashed potatoes, about 7 to 10 minutes. You will need to stir almost constantly the last few minutes as it thickens.

Step 3: Remove the pan from the heat and set aside. When the dough has cooled, turn it out onto a floured board. Knead the dough with your hands, adding more cornstarch as needed, to create a workable clay.

Tips:For tinted clay, knead in a few drops of food coloring. Allow creations to air dry over-night. Refrigerate any leftover dough in a ziplock bad for up to three days.

Edible Peanut Butter Playdough

18 ounce jar peanut butter
6 Tablespoons Honey
Non-fat Dry Milk

Mis together first two ingredients, then add dry milk until dough is not sticky. Allow children to mold and shape like regular play dough.

Snowball notes Summer?


Preserve winter memories with a friend. Write a note, wrap it in plastic and pack a snowball around it. Wrap the snowball in aluminum foil or place it in a sandwich baggie. Trade with a friend. Store your snowball in the freezer. Defrost it on a summer day for a cool reminder of winter. We defrosted it while playing in the lawn sprinklers.

Ice bubbles


Put those winter days to use with a little science fun.

What you will need: bubble solution and a bubble wand on frigid day.

Choose a windless day below 32 degrees to do this science project. Go outdoors and gently blow a bubble without releasing it. Keep the bubble on the wand and watch carefully. What happens? You will see ice crystals forming until the blower freezes completely into a clear bubble of ice.